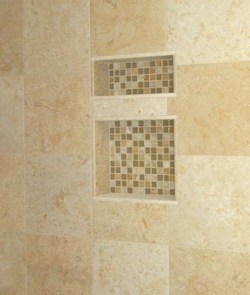
A great way to make more room in your shower is to add a niche or 'built in shelf'. Instead of the hanging shower caddy or setting your bottles on the ground or ledge, you can tuck all of your soaps, shampoos, conditioners, razors, etc in a built in shelf. If you organize your shower or bath space it will feel larger than it really is. These small recessed spaces have becoming in new tile showers or shower remodels in both old and new homes.
Niche Size and Location
The first thing you need to figure out is the size of the niche you need in your shower before you consider location. Once you determine the necessary size, you can plan where it will go to accommodate your dimensions. Think about the size of your shampoo bottles and make sure you have enough room to fit everything.
Once you decide on the size and your location on the wall, fine-tune its position with a story pole to be sure that the niche opening will line up with the grout joints. You should transfer the layout marks from the story pole to the studs to orient the framing of the niche and then again on the backer-board once its installed to guide the layout.
Frame your Niche Larger than Necessary
When framing your niche opening, use horizontal 2X blocking between the existing studs . No matter the framing, always frame the niche at least 3/4 inch to 1 inch larger than you want the final opening to be to accommodate your tile. It will give you more options for tile type and placement. If you're using quarter-round edge tiles, give yourself even more room for your mortar, backer-board and tile.
Lay Tile Like A Typical Wall
Tiling a wall with a well-appointed niche is done like any other wall-tiling project. When working in the shower niche, you can install a row of tiles on the bottom of the niche first, then a row in the back that are flush with the bottom tiles. In some bathrooms you can replace the bottom tiles with a piece of solid stone for a dramatic yet elegant look. The installation sequence is the same but the visual interest is certainly not.
If you are looking to buy bathroom tiles for your niche, check out a local home improvement store (Home Depot or Lowes) or a tile specific store. For granite tiles, check out the Lazy Granite website. They offer granite tiles for bathroom and kitchen remodeling projects.
 RSS Feed